



Gaming
Games
GTA 6 best settings: The options you should change first on PS5 and Xbox
Before you even start playing GTA 6, adjust the graphics, controller and subtitles settings to make Leonida look sharper, play smoother and feel way less chaotic.
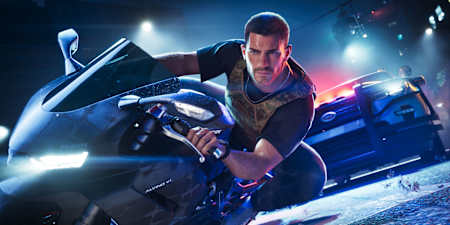
GTA 6 is finally here, and Lucia and Jason are ready. But before you head out for your first mission, hold on a second. Grand Theft Auto VI hides a surprisingly deep options menu, and a handful of tweaks make a huge difference. Here are the best GTA 6 settings for PS5, PS5 Pro and Xbox Series X/S, from aiming and controller tuning to HUD, audio and a few hidden quality-of-life gems.
01
Graphics and performance
Let's get the big question out of the way: no, there's no secret switch that turns Vice City into a 60 FPS playground. Rockstar targets 30 FPS across the whole lineup, from the base PS5 and Xbox Series X/S all the way to the PS5 Pro. Rockstar went all in on simulation density and detail, and that costs frames.
PS5 Pro owners still get something extra. The Pro version uses PSSR, Sony's AI upscaling, for a cleaner and sharper image, plus ray-traced shadows that are exclusive to the Pro. On a regular PS5, you get DualSense haptics, Tempest 3D Audio and fast loading.
Your best performance boost therefore happens outside the game. Switch your TV to Game Mode, turn off motion smoothing and other picture enhancers, set HDR to On When Supported, and run the console's HDR calibration. 120 Hz output and VRR won't magically double your frame rate, but they don't hurt either.
02
Kill the blur and stop the wobble in display and camera settings
GTA 6 is cinematic by design, which is great in cutscenes but slightly less impressive when you whip the camera around during a shootout and everything turns into a watercolour painting. Head to Display, then Visual Effects, and drag Motion Blur Strength all the way down. Zero gives you the crispest image, while a low value keeps a hint of film feel.
The camera deserves the same treatment. Turn Camera Shake off and drop Camera Bob from the default 10 to between three and five. Your character still moves naturally, but walking, running and swimming no longer feel like a handheld documentary. Leave Camera Preference on, so the game remembers which view you like in which situation.
Next up is brightness. Calibrate it with the test images on your own screen instead of copying someone else's numbers, because every TV is different. Brightness Reduction tones down glaring light sources, and High Contrast Shaders make characters and interactive objects pop. Handy when the Leonida sun is doing its thing.
The best settings at a glance:
- Motion Blur Strength: 0 to low
- Camera Shake: Off
- Camera Bob: 3 to 5 (default: 10)
- Camera Preference: On
- Brightness Calibration: Use the test images on your own screen
- Hit and status effects: Lower if they block your view
- Cinematic kill and crash cams: Reduce if they break your flow
03
The best controller settings for GTA 6
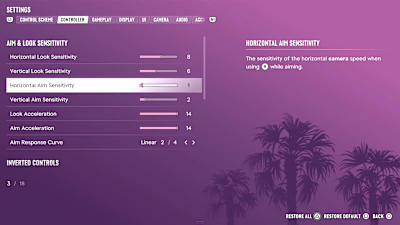
These are the best aim settings in GTA 6
© Rockstar Games
Aim and Assists
When it comes to controller settings, GTA 6 mainly offers some tweaks to aiming and assists. For your first hours in Leonida, set Targeting to Partial. It helps you hit what you're aiming at without playing the game for you. Want more help? Lock-On is the forgiving option. Feeling like a pro already? Free Aim gives you full manual control.
Aim Assist Strength works best at four to start with. Keep Shooting Assist and Drive-By Assist on, as they make car chases and shootouts from the driver's seat much less frustrating. Quick Draw should stay on too: a squeeze of the trigger pulls your last-used weapon straight away.
Two options to leave off for now are Accessible Combat and Reduced Vehicle Damage. Both noticeably change the balance, with lower enemy health, less damage taken and tougher cars. There's nothing wrong with using them, but try the game as intended first.
The best settings at a glance
- Targeting: Partial (alternatives: Lock-On, Free Aim)
- Aim Assist Strength: 4
- Shooting Assist: On
- Drive-By Assist: On
- Quick Draw: On
- Accessible Combat: Off at first
- Reduced Vehicle Damage: Off at first
Looking for more GTA content? Check out these stories
04
Sensitivity, response curve and deadzones
Look and aim sensitivity both sit at seven by default. The trick: drop aim sensitivity to five or six and leave look sensitivity where it is. That way, you can still swing the camera around quickly while exploring, but small corrections while aiming become much more precise.
For the Aim Response Curve, Standard is the right choice for most players. Precision slows down movements near the centre of the stick for fine adjustments; Aggressive reacts more strongly to small inputs; and Linear gives you the most direct, unfiltered response.
Deadzones are a matter of feel and controller condition. Smaller values make the controls snappier, but if you go too low, your camera starts drifting by itself, even when you're not touching the stick. Lower it step by step until you notice drift, then go back up a notch.
The best settings at a glance:
- Look Sensitivity: 7 (default) or higher
- Aim Sensitivity: 5 to 6
- Aim Response Curve: Standard
- Deadzones: As low as possible without drift
05
Change the control scheme
Okay, this is the biggest control shake-up in decades as GTA 6 ditches tap-to-sprint. Instead of hammering X or A until your thumb files a complaint, you click the left stick to run. On a bicycle, you still pedal with X or A.
Not a fan of that? Fortunately, you can use your preferred method: Under Settings -> Control Scheme you'll find three layouts. The Classic scheme swaps the run and crouch buttons, which takes some strain off your left stick. Left-handed players get a dedicated layout too (and we love that!). One more change worth knowing before your first police chase: the handbrake now sits on X or A instead of a shoulder button.
06
Best settings for HUD, map and subtitles
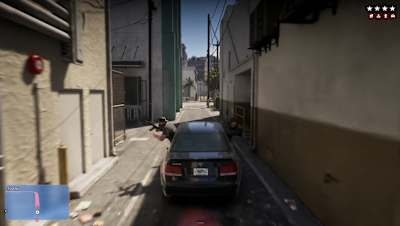
Your minimap is your best friend when it comes to navigation
© Rockstar Games
Leonida is huge, and your minimap is your best friend while navigating the landscape. Set it to always visible instead of Dynamic, so it doesn't vanish when you need it most. Keep GPS Route, GPS Turn Indicators, In-World Markers and Interaction Markers on to make finding your key locations easier. You can, however, still go for a full minimalist layout later on.
When it comes to subtitles, everyone has their favourite. Some like having a visual clue of what's spoken, while others prefer the more cinematic style. You can turn subtitles on and switch them to the widest option, so you can follow chatter outside of missions as well. Add speaker names and a subtitle background, which help a lot in bright or busy scenes, and set the UI text size to medium or large.
And because not everyone thinks in miles and Fahrenheit, switch units to metric and the clock to 24-hour format. Help Text, Reminder Tips and mission updates are worth keeping at the start. Once the HUD feels crowded, mute the less important progress notifications.
07
The best audio settings
Okay, everyone who has already played GTA 6 can testify that the voice acting in this game is on another level. Rockstar's dialogue is half the fun, so keep the Dialogue volume high. If conversations get drowned out by gunfire and the radio, lower Music and Sound Effects to around seven or eight.
Playing with a headset? Then Tinnitus Reduction is a feature work checking out. It tames the high-pitched ringing after explosions.
Streaming or recording your gameplay? Switch on Mute Licensed Music. Just don't treat it as a full copyright shield, as not every sound in the game is guaranteed to be cleared.
08
Accessibility and quality-of-life helpers

Adjust the settings to your preference to enjoy the beauty of GTA 6
© Rockstar Games
The Accessibility menu is packed with options that make life easier for everyone, not just those who need them. Tap Assist turns rapid button mashing into single presses. Hold Assist and Hold Delay make sustained inputs more comfortable.
Simplified Mini Games reduce the input load for basketball, hot-wiring cars and gym workouts. Our favourite underrated tweak: set fishing to Hold. Your thumb no longer has to draw endless circles on the stick.
Auto Drive is optional and works together with the cinematic camera. In the Restricted setting, it only kicks in when the situation is safe, so it won't steer you head first into oncoming traffic.
The best settings at a glance:
- Tap Assist: On if button mashing annoys you
- Hold Assist/Hold Delay: Adjust to taste
- Simplified Mini Games: On if you want less hassle
- Fishing: Hold
- Auto Drive: Optional, restricted mode recommended
GTA 6 offers a lot of flexibility when it comes to adjusting the game to your preferences. Just remember that not every setting and every slider needs to be adjusted and fits every gamer or playstyle. Just experiment with a few settings you like and find the ones you prefer.
Everything we know about GTA 6
About the author
