




Gaming
Esports
How to Ward like a League of Legends pro
These warding tips will boost your League of Legends vision game and take you one step closer to being as good a support as G2 Esports' Labrov.
Wards win games.
It’s as true now in 2026 as it was when League of Legends released in 2009. Wards don’t deal damage, but they let you survive ganks, set up picks and secure major objectives. That’s pretty good for just 75 gold.
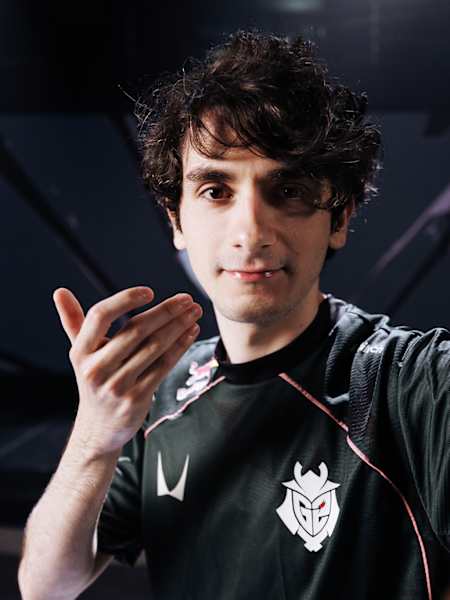
If you want to be an elite support like G2 Esports’ LEC Summer MVP Lampros "Labrov" Papoutsakis, you’ll need to get your head around warding and learn how to win the vision game.
Whether you’re a support main looking to master your role or a sololaner looking to become a more well-rounded teammate, these warding tips are simple but effective and will have you playing like a pro.
01
How to best use Faelights
For the 2026 season, Riot Games added a new feature to make warding easier than ever in Faelights. These tiny mushroom circles can be found in both rivers, outside base gates and next to side lanes after the Elemental Drake map transformation.
Faelights will supercharge any wards placed in them, extending their vision by 25% and giving vision in a large nearby area, including inside bushes, for 45 seconds.
Both teams can benefit from the same Faelights’ bonus vision. However, each team can only have one ward in the same Faelight at a time. Placing a new one will destroy the first ward and refresh the 45 seconds of bonus vision.
While extremely powerful, you don’t want to always ward in them. Faelights are the most likely spot to be swept, so unless you’re constantly pushing, placing a control ward in one is just giving away gold.
Primarily, you need to make the best use of Faelights’ 45-second window. If you want to push without fear of a gank, warding a Faelight in the river will give you exactly enough time to safely siege a turret and retreat. The base gate Faelights are also excellent for defending your base and checking if it’s safe to enter your jungle.
Also, note you won’t see the animation when an opponent wards a Faelight. However, sweeping or using a control ward within that bonus vision will put a moon above your head to reveal that you’re within a Faelight’s vision – meaning you can wait out the 45-second timer before making your next move.
02
Don’t be afraid to ward outside of brush

Playing less predictably will give you the edge
© Riot Games
Time to immediately rethink everything you thought you knew. Of course, it usually makes sense to place wards into brush because you can’t see into them. But doing what is standard makes you predictable.
By occasionally warding outside of bushes and Faelights, you can still gather just as much information, but you have a slightly better chance of enemy sweeps missing them. Enemies will regularly autopilot to Faelight spots, so take advantage of that.
While Faelights are excellent at highlighting the river, that’s less useful for starting Baron or Dragon. Instead, warding past the pit or somewhere that covers multiple river entrances to spot opponents approaching for a steal is significantly better.
Warding deep into lanes can also be great to see where the enemy team is rotating to next, especially in the mid lane.
03
Information is power
You already know how important wards are, but it’s important to contextualise and regularly remind yourself what you want to accomplish with your wards before placing them.
You need information to make good decisions. Wards will give you that information. But also, that knowledge can help inform where you ward. Let’s explain.

Labrov has won many European titles
© Riot Games
The deeper you can get your wards, the better. By spotting the enemy champions sooner, you can react quicker to their moves and have longer to decide on the correct play. This will also increase your team’s tempo and stress out your opposition into possibly making mistakes.
Deep wards can spot what camps the enemy jungler is doing, when champions are roaming to other lanes, and might even find when opponents are recalling. These are all crucial pieces of information that can help guide your next play.
You should always ward with your team’s next move in mind. Deep vision to help take a major objective, river wards to safely split-push, warding your own jungle when behind and wanting your carries to farm.
But don’t go on a wild solo mission into the enemy jungle. You should only try for deep wards when you know you are safe to do so. Usually, this is when you’re ahead and have pushing lanes so nearby teammates can help if need be.
If the enemy jungler dies and you can see all of the opponent’s laners, then you can also try for deeper jungle wards. As a general rule of thumb, you don’t want to move much further than turrets you’ve taken in the nearest lane. Taking turrets opens up the map; that’s why sieging is so important.
04
Remember to ward your own jungle

Ward like a pro and win more games
© Riot Games
It can be easy to tunnel vision into warding only to protect your lane from river or trying for deep wards. But it’s equally important, especially when even or behind, to place some defensive wards in your own jungle too.
Defensive wards can prevent opponents from invading or setting up dives, help you figure out where their support or jungler has placed deep wards, or help your team discover a numbers advantage to find a pick and then claim an objective to mount a comeback.
Ultimately, try your best to constantly analyse the state of the game. Figure out what both teams want to do in the next five minutes and place wards with that in mind. It’ll take time, but as you keep playing your game sense will naturally improve.
05
Warding outside of support

Even Faker places wards – you have no excuse
© Sebastian Kraft/Red Bull Content Pool
The support only has so many wards they can place. It takes a full team effort to win the vision war, so here are some warding tips for other roles.
The top lane is an island, meant for isolated 1v1s. To keep it that way, tracking the enemy jungler and placing your trinket in the nearest Faelight is going to be crucial to surviving lane.
And don’t forget to swap to a Sweeping Lens in the mid game. Disappearing into the enemy jungle while sweeping to dodge wards will leave opponents guessing if you’re going to push again or group mid, forcing your opponents to chase top while your team gains advantages elsewhere.
For the mid lane, it’s similar. If you’re going to ward a Faelight, place it on the opposite side that your jungler is headed, then stand on your jungler’s side of your lane.
Sweepers and control wards are crucial for roaming too, so try to pair up with your jungler and place some deep vision to plan some roams ahead of time.

Labrov plays with full focus
© Riot Games
And while ADCs can rely on their support, warding the bot lane bushes on the alcove side can significantly help your support set up engages and trades to win the 2v2.
For all laners, make sure to push your wave under turret before disappearing to ward so that your opponent can’t follow without losing resources.
Meanwhile, Junglers should focus on tracking the enemy jungler. Try to get control wards deep into the enemy jungle in a place less likely to be spotted so you can see what camps they are heading for, so you know where to gank to counter-invade.
About the author
